Saturday 30 December 2017

N/S Half Shaft Out

I worked some trolley jack magic today to get her out far enough to be able to remove the N/S half shaft, and the other swivel hub I need to rebuild..


Repair Stud

Having fit the first of the rebuilt swivel hubs I went to fit the new hub parts and brake drum and get the wheel back on. What could go wrong?

First, I couldn't get the hub back on the stub axle. It was definitely the same stub axle carrier I took off that side as it's the one with the land that can be turned by hand. I tried the old inner bearing, and found that quite tricky too. The angle had to be just right and even then only one in ten attempts to get it over the lip of the stub axle was successful. I polished the stub off with the angle grinder and rust and paint removal disc. That didn't make much difference, but I put the new greased bearing back in the hub and went about it more carefully. After a couple of minutes it slid on - just as a good song came on the radio.. ;-)

Next, the new brake drum wouldn't go on. The old one slid straight on, but not the new one. I started tapping around it gently with a rubber mallet to try and work out the obstruction - and a wheel stud popped out!

Indoors, with the stud, I found it was actually a repair stud:


I assumed due to its 'pull-in' fit it had come loose when the hub was off and had been at an angle preventing the new brake drum to pass on. I put it in, and when I tried to find a wheel nut to pull it back into the hub with - I eventually worked out only one of my wheel nuts fit it, and that it was very slightly bigger than the original studs. Then the penny dropped, and I drilled out the right hole in the new brake drum ever so slightly - and it went on.

I tested the tension on the steering arm before connecting everything back up on that side and got movement at around 15lb, which is just right. Next I put the wheel back on and set about getting the Land Rover out the garage enough to remove the half shaft on the other side to get that swivel hub off for a rebuild..

Saturday 23 December 2017

O/S Swivel Hub Back On

I've managed to get the O/S swivel hub back together and back on the Land Rover. New axle case oil seal, gaskets, swivel housing seal, retainer, top pin, bottom bearing, and fixings. I also fit new a steering lock stop bolt and plate, and jack stop (it's meant to be there..).

I still need to check the shims are set right by putting a spring balance on the steering arm, and I need to order some new nuts for the steering arm bracket studs on the underside. I ordered by part number from my 2/2A parts catalogue, but these parts were beefed up somewhere around 1966, and as mine's a '69 I need to order with part numbers from the Series 3 catalogue. I can replace those in situ when I get them in the new year.

Tidied up stub axle carrier and new brake shoes and cylinder also back in place. If things continue I could get onto the N/S before the end of my Christmas break.


Saturday 16 December 2017

Stub Axle Carriers

I got half an hour today so I decided while I wait for new bolts, studs, and axle case oil seals to arrive I would clean up the stub axle carriers and fit new lands (distance pieces).

When I stripped the OS hub I found the land was loose that side, so I cracked it off with a cold chisel and ordered two new ones. When I cleaned that side up today and fit the new land, I only needed a bit of WD40 to fit it by hand, and I can still turn it by hand now it's on. The NS was a different story though. The land was much harder to remove, and fitting the new one required heat and a mallet and a few minutes working it down into place. Now it's on, I can't turn it by hand at all.

Which leaves me wondering why one side is "loose" (there is no gap, but I can turn it by hand and could remove it by hand). The stub axle pieces look identical to the eye, but the OS is clearly very slightly narrower (uniformly, all the way down, not just worn or narrower at the lip or at one point..).

Just a slight difference in the precision of the machining back then I suppose. As a spacer it makes no difference that I can turn it by hand.


Saturday 9 December 2017

Still Alive

Well, plastering and painting in my kitchen have taken priority, but now I have enough brownie points in the bank to get these swivel hubs refurbed over Christmas..

A bit of wet'n'dry brought the housing up nice


Sunday 12 November 2017

Progress Report - 3 Months

It's three months today since I winched this old Land Rover down onto my drive, so it's time for the first quarterly look at progress:

Dumb irons will need capping and + a bit of sleeve

Here's the progress I've made in these first three months:

  • Brought it home!
  • Stripped it down to work on and fit in the garage
  • Fitted new wheel brake parts (rear)
  • Fitted new bearing and hub parts (rear)
  • Tooled up
  • Passed a C&G Level 1 MIG Welding course
Now I'm set up and in progress and have what I need and somewhere to work, hopefully I can get more done in the next three months than in the last three.

Three months from now I'll be a happy man if I can finish the swivel refurb, fit the new brake and hub parts on the front, refurb the springs and replace the shock absorbers, and have made a start on the welding.. we'll see, best laid plans and all that. Christmas is coming!

Tuesday 7 November 2017

Swivel Refurb

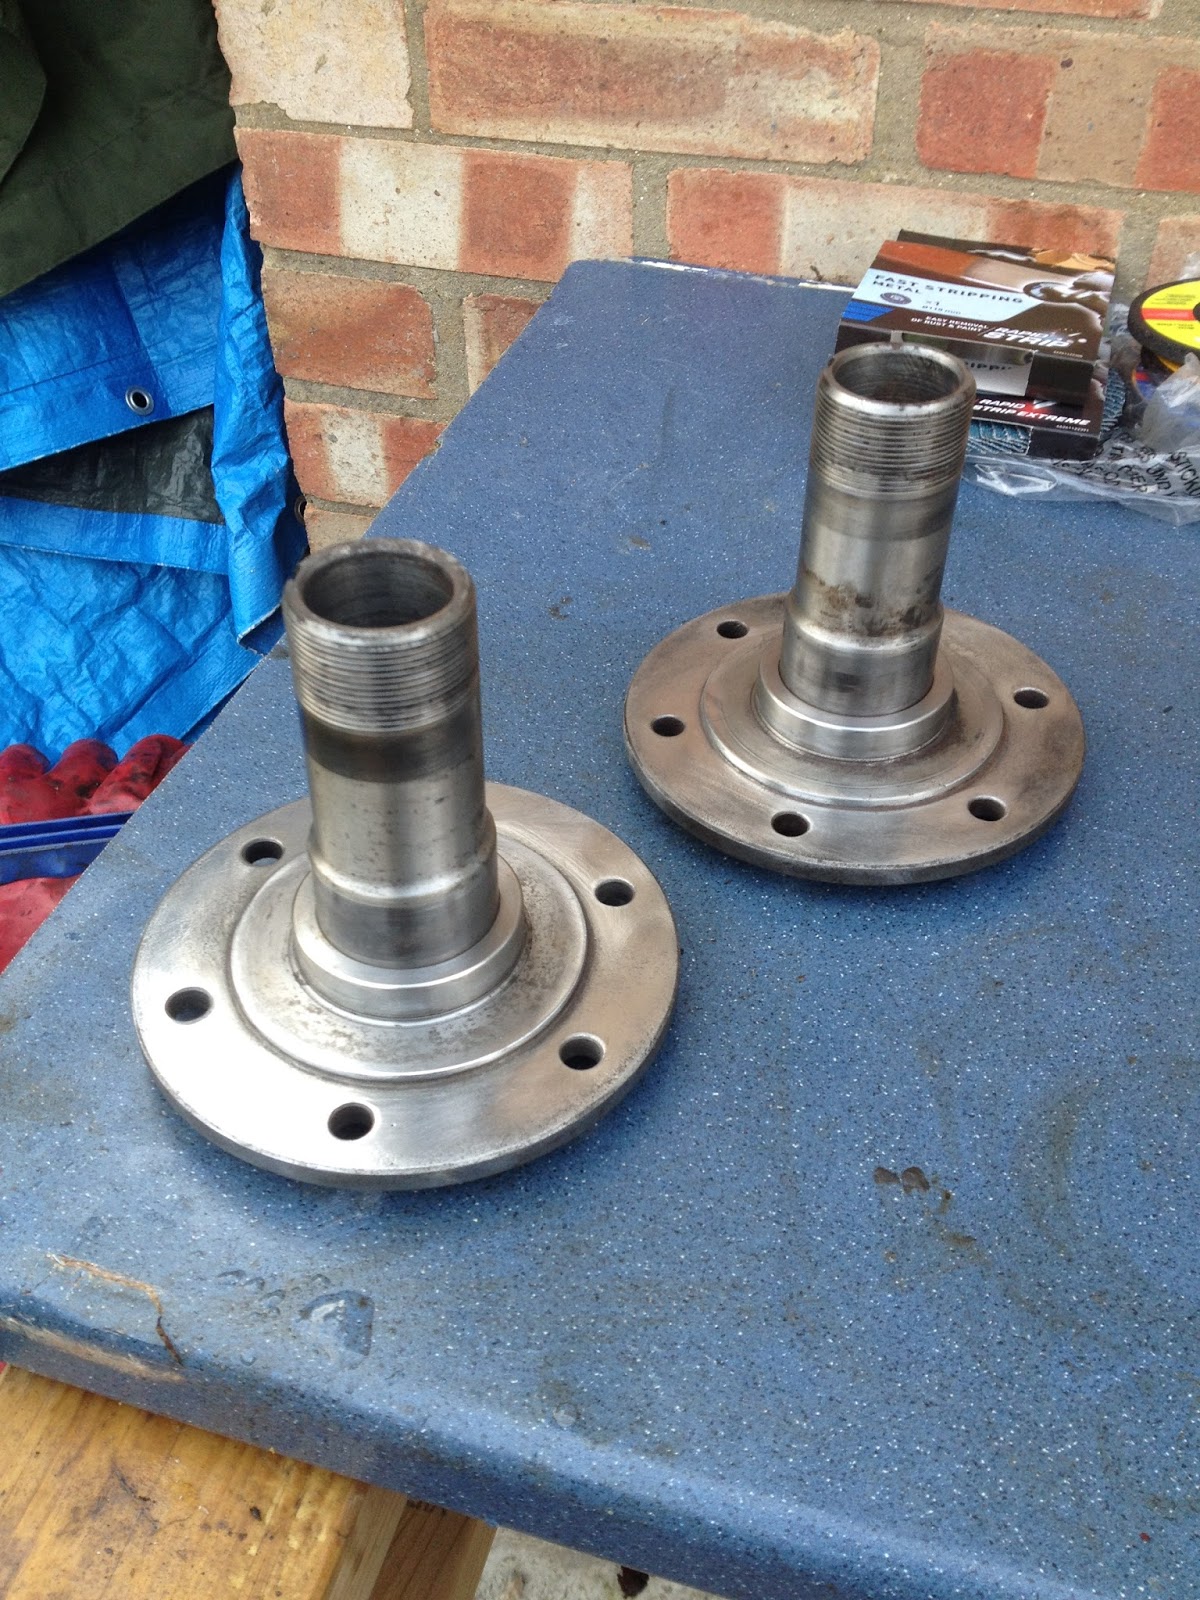
Last week I set about replacing the same brake and hub parts on the front axle as I'd just replaced on the rear.

All the inner and outer bearings were incredibly loose in their cages. I could almost push the inner necklace out by hand. When the new ones arrived they were much tighter. The races were ok.

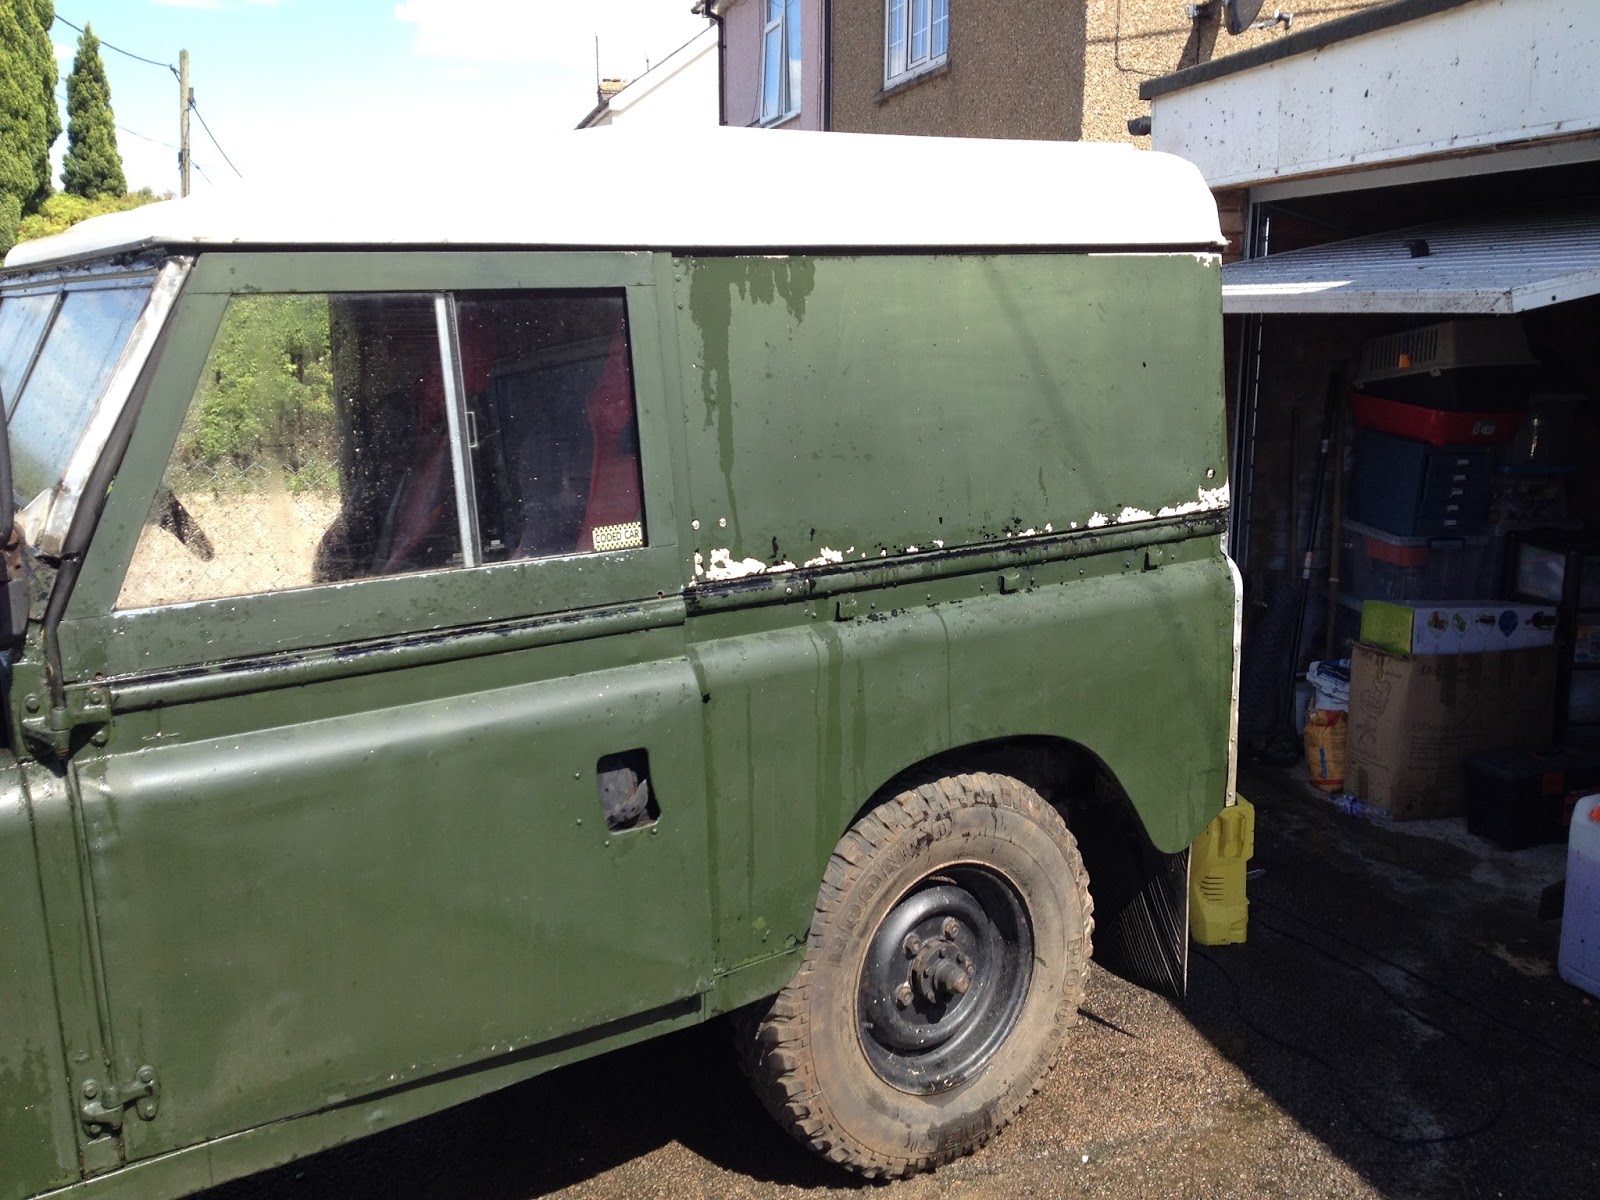
With the front on axle stands and the wheels off it was a good time to check the steering and swivel assemblies.. cue unexpected detour!

I adjusted the steering to remove some play from the wheel. With the wings off I could watch the steering through its full range both ways. When I went to check the steering lock stop bolts were set to 1/2" (I'll check them again with the wheels on as I have some big tyres at present), I found one was a bit short - and promptly rung the head clean off. It looks like it will drill out easily enough..

I found there was no steering lock bolt or plate on the other side at all. The steering in that direction was limited only by the track rod geometry. Consulting The Book revealed I was also missing the jack location plate on the off-side - not incredibly important, but worth £1.50 to be as it should.

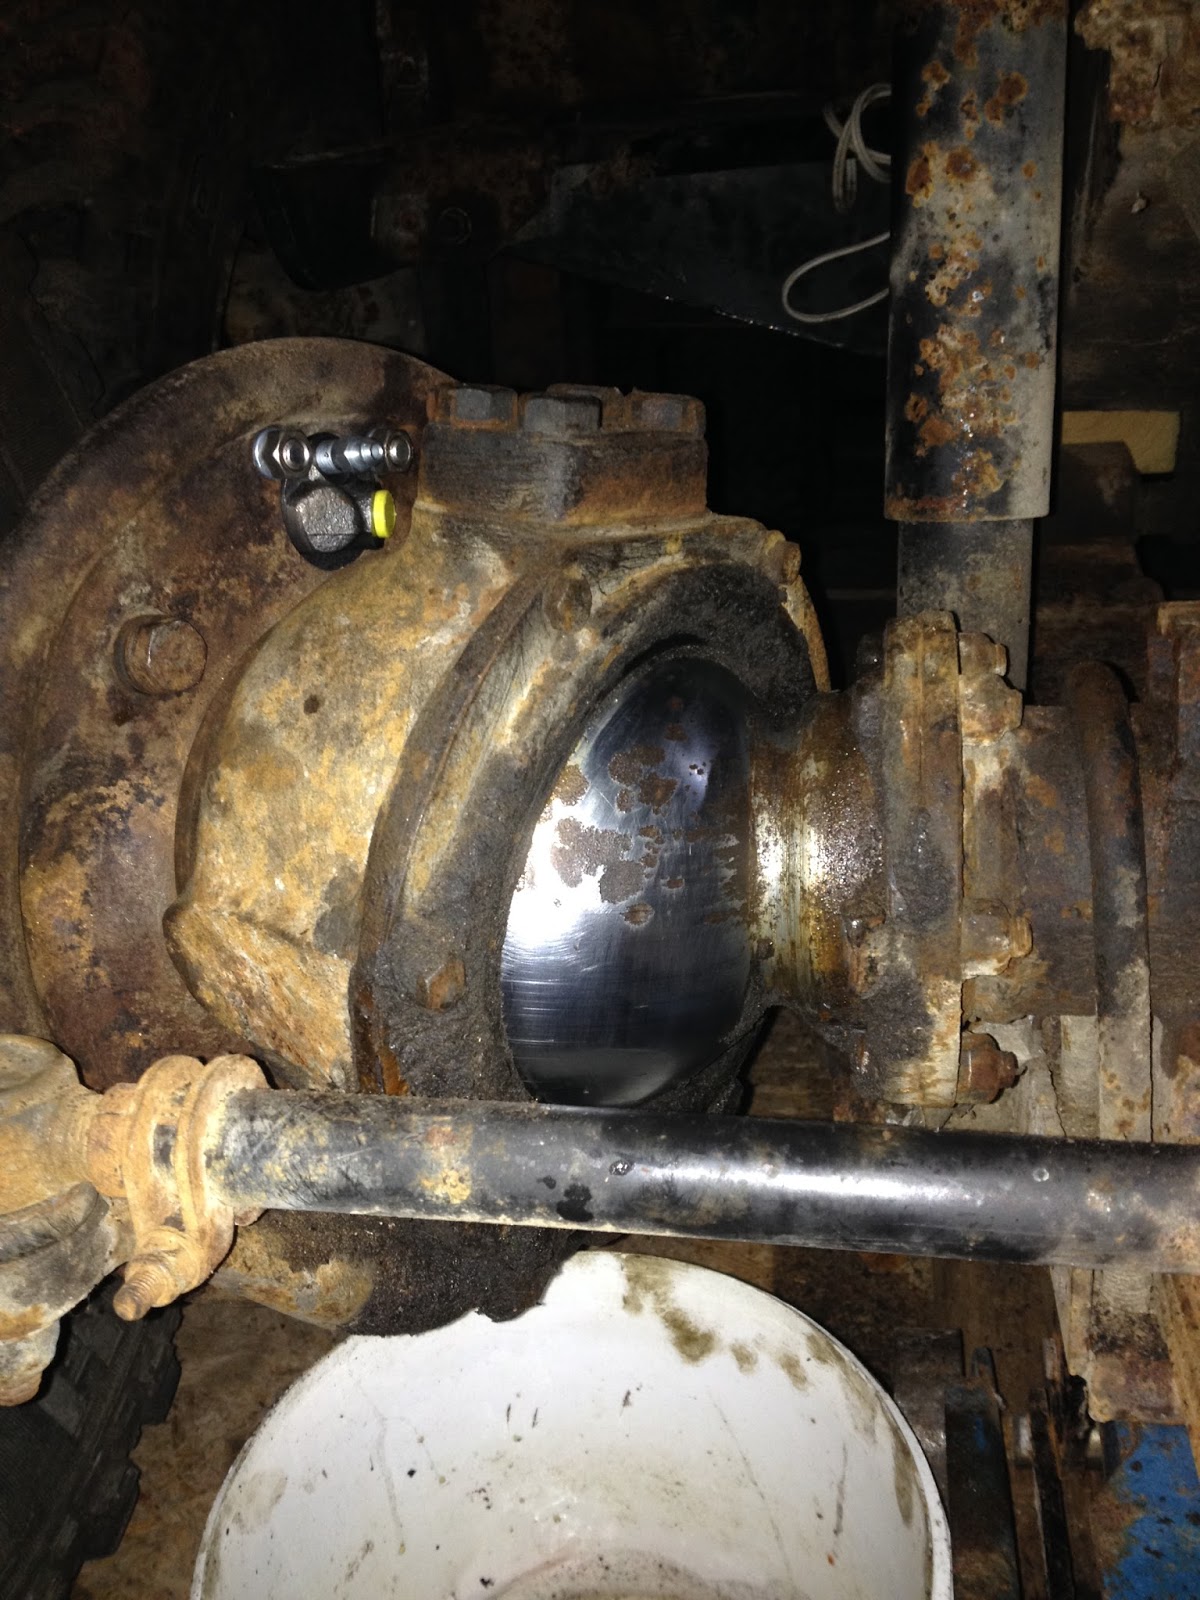
Next I checked the swivel housings. As you can see from the pictures, they are not TOO bad, some light rust I could file or emery cloth off. Maybe. I would have left it at that if they held oil..


The drain plugs came out wet which I took as a good sign - I knew I'd drained what might have been in there when I had the brake back plates off to clean up as they were far more oily than on the rear. Oily brake back plates, rusted swivel housings, rusted old seal retainers, congealed oily mass on the bottom pins.. Sounds leaky doesn't it? I put some gear oil in each side with a clean drip tray underneath and went back the next day to find both were leaking - while standing, with cold oil.

So before I fit those new hub and brake parts on the front, I will first replace the swivel seals, retainers, stub axle and housing to axle case gaskets, clean up the housings, and fit new steering lock stop plates both sides - and a jack stop(!).

Hopefully they'll hold oil when I've finished. If I can't get the housings appreciably cleaner I will replace them but I'm hoping they can be tidied up. I prefer to clean and mend than replace where possible.


Sunday 29 October 2017

Rear Wheel Brake and Hub Service

The rear brake drums were badly scored inside, and the off-side was also badly contaminated with oil. I fit new cylinders, shoes, springs, anchor plate locking tabs and screws to both sides. The brake back plates didn't need much cleaning up, even on the off-side.

I thought the bearings were ok initially, from checking the wheels for play, but when I removed the hubs to replace the oil seals I found the outer bearing cages on both sides were slightly crippled. It was as if they had got stuck and been under pressure but unable to move and had started to fold slightly. Inner bearings, races, and stub axle lands were fine though so I set about fitting new oil seals, outer bearings, drive shaft nuts and washers, drive flange gaskets, felt oil seals, split pins, dust caps, and brake drums. I re-packed all the bearings with Castrol high temperature grease.

Once I'd done all this to both sides at the rear - hey presto, I could move her about by hand!

Not much here worth keeping.
New brake and hub parts in place. (Remnants of light green and red paint on drive flange and bolts - this Land Rover has been through some wardrobe changes!) (Also, compare with same side 'before' photo in 'Rear Brakes Seized' post from September).
Shiny!

Sunday 15 October 2017

Working in a Small Garage

Today I put some racking up at the back of my small garage.

I had managed to fill the back of the Land Rover and cover the floor to the rear with piles of drip trays, canisters, tools, and new and old bits and parts. I couldn't easily walk around the already tight space anymore, or find what I was looking for when I needed it.

I was going to wait until some cheap wood or metal turned up and make my own, but decided to treat myself and get on with it. Having everything off the floor and out the back of the Land Rover is a big improvement.


It's still a tight fit back there, but I can stand between the rear of the vehicle and the racking and turn around freely. I don't need to swing a cat..

I work in the garage more than I do on the driveway. Getting organised to make this possible means I can get an hour here and there on a week night, which adds up. I position the Land Rover as far to one side as I can, depending which side I want to work. Once the relevant wheel is removed (I've been servicing brake and hub parts so far) I have room to put a mat down and kneel at work. I can do this whatever the weather, day or night, and leave things in whatever state I want to and resume where I left off another night. There is little to no setup and pack-up cost like this.

In addition to being organised and storing things vertically, I would say lighting is the only other part of the puzzle to working at night in a small garage. I have a single bulb overhead, an angle-poise lamp I can hang and twist to point where I need it, and I also wear a head torch - a very small lightweight one I use when I'm night fishing, you forget you're wearing it after a while - *so wherever I look gets extra light and I never cast a shadow with my head*.

I've just been out there tonight for an hour. With the lighting sorted and things organised better now and a mat down and some music going and a mug of tea.. it's actually very cosy!

V888 - Computer says 'No!'

Well, Data Protection Act says 'No!'.

I didn't have high hopes for finding previous owners via the DVLA but I submitted a V888 anyway. The reply I got explained they can only carry this out if essentially required by a court.

I do have the previous owner's contact details, and I will be getting in touch to see what they can tell me about the years they had this Land Rover.

Friday 29 September 2017

BMI Heritage Certificate

I applied to the British Motor Industry Heritage Trust for Sandy's certificate of origin. The certificate confirms the chassis number logged in the factory ledger at Solihull, her original colour, marque and a few other things.

It looks like she started off life in Gloucestershire in 1969, where I also bought her from her fourth owner in 2017 (via a trader based in Surrey). I have submitted a V888 to the DVLA in hope of finding out where she spent her time in-between.


Draw Bar

I moved Sandy in and out of the garage today with a new draw bar I made up with my Dad while visiting him in France. We made it from a cheap(ish) tow hitch, a small length of box section and a C-clip. It can rotate on both vertical and horizontal axes, so works at an angle and on small gradients. It fits between my Astra's front offside towing eye and the Land Rover's front nearside tow ball.


When I push her back in, the small amount of slack is taken up by the rounded front of the towing eye setting into the end of the box section, where it is still able to rotate if the vehicles are moving at a slight angle.

Problem solved!

Friday 8 September 2017

Vehicle Numbers

Sandy is an 'H' plate, first registered 15th September 1969.

Chassis: 241*****G - Began April 1969; headlamps moved into wings; cross-shaped grille; number plate to centre of bumper.

Engine: 241*****A - From January 1969, the 4-cylinder petrol engine moved to an 8:1 Compression Ratio, giving a slight boost to bhp.

Gearbox: 254*****E - 'for 2.25-litre petrol models..'; In December 1968 gearboxes began 253*****E, so this tallies with a September 1969 registration date.

Front Axle: 241*****B ((88 RHD '2A' Axle)

Rear Axle: 243*****B (88 RHD 'from December 1966', '2A' axle)

Looking at the numbers then, there's a very good chance she still has the engine and gearbox she came off the line with.

Wednesday 6 September 2017

Into the Garage

On Sunday 3rd September I moved Sandy into my small garage. The up-and-over door meant I had to remove the hard top first. I took the cat flap, doors, and bonnet off at the same time and put them in storage. I won't be needing them for a while and they don't need repairing.

It's a tight fit, but it's lockable, out of the elements, and has power. There's enough room at the back for some narrow racking to keep tools and parts on. I will build that out of wood and metal as and when it turns up.

I could not push her in by myself (front brakes likely seized as the back were) so had to use my Astra, bumper to bumper, to push and pull her in and out as I lined her up. This is clearly no solution for moving her about on a regular basis. I had to put wood between her front tow hook and the Astra's bumper when I was pushing, and use a tow rope to pull.

I see two main options here. One is to make up a rigid drawbar that I can use to both pull her out and push her back in. This would be quick and easy once I'd made it. Or, I can get a pair of mobile axle stands and push her from one side of the garage to the other depending what side I'm working. This would mean I can have the wheels off and out the way and also work inside during the more inclement weather that's on its way..

I'll probably persevere with the tight fit for a while. The first actual job is now looming, which will be to remove the wings and start on cleaning up and painting the chassis. I only need room to scrawp about with a power tool and paintbrush for this, and I could even replace the brakes with the little room I have now. Ultimately, I'll want to get her in and out the garage for welding, and move her around inside to do other things when the weather's bad - but I don't need to do either just yet so I'll make do for a while. With the days getting shorter I will need to upgrade the single light bulb at some point to a strip light, and acquire a hand lamp or two, but again, I'll probably wait until my hand is forced.


Hard Top Removal

Removing the hard top was straightforward. But I did learn something. :)

I found there was almost none of the sealing rubber left between the windscreen and roof. The remains of this seal was evident though, so I know it had been there at one time. There was no seal at all, and no sign there had ever been any, between the roof and sides though..

When I popped the back of the hard top up I found it was not fixed in any way to the cab section above the cat flap. I expected this "cab roof assembly" to be one part once unbolted from the hard top sides - and to need to remove the cat flap separately.

On closer inspection I decided it looked like a LWB roof had been cut down to size and a lip hammered down over the back. I thought it looked rough and not completely sealed when I went to view it but wasn't sure what exactly was wrong and went back to checking more important things like the chassis and bulkhead. Now I know (well, I'm 80% sure), and still, it's no big deal. These old Land Rovers have all sorts of "history", it's partly why we like them so much.

Originally, Sandy might have been a truck cab or half canvas. This might explain the ancient remnants of a seal above the windscreen and complete lack of any over the sides.

Next time I get to look around a few at a show in detail I will be looking closely at cab roof and canvas assemblies. I think I know mine was not originally a hard top now, which has me wondering what I want to restore it to eventually. Land Rover can tell me what colour it was originally, maybe they can also tell me what roof it had?

Anyway, it's off now, and along with the doors and bonnet and cat flap, safely stowed elsewhere to free up room for moving around her in the garage while I work..


Saturday 2 September 2017

Rear Brakes Seized

For the rest of August I spent a few evenings checking her over and compiling a list of everything I think I need to get a new MOT. I also took those hideous seats out!

I'm halfway through the close inspection and haven't found anything truly shocking (yet). When I strip her down to start work on the chassis I'm sure I'll find more than the outrigger or two and single patch weld I'm aware of..

I found out why it was so hard to push. The rear brakes were seized solid (OS also badly contaminated). I couldn't even get the drums back on without removing the shoes first. I've no reason to think the front are any better so I'll need shoes and wheel cylinders all round. Most likely drums too, which aren't expensive. One of the rear ones was very badly scored.

Removing one of the seized brake drums.


Badly scored, but cheap to replace.

Contamination to OSR. Hub seal in bits.

Nothing worth saving here..
Wheel bearings seem good, and there were a used pair in the box of bits that came with her so I expect they were changed not long before she was SORN'd.

Engine needs a service obviously, fuel and oil change, plugs, points etc. but she didn't smoke when we got her running initially so I'm hoping there's nothing seriously wrong under the bonnet.

Axles will get oil and clean breather holes and new seals all round but nothing internal - it's all about the MOT first. I did pull the rear half-shafts out for a look and they seemed ok. I didn't measure the spline wear but they looked well defined and reasonably equal.

Most of the electrics work with some bulbs gone and maybe a faulty earth here and there.

I've been finishing a garden shed to house everything that was in the garage. Now that's done I can take the top off and roll her back into her new accommodation, get her on axle stands, and hopefully start to make some progress.


Saturday 19 August 2017

Jetwash

She didn't move an inch during the relay home - much to my relief as it was my first time driving a loaded transporter!

A good jetwash the next day brought her roof up bright and clean and revealed the classic hard top colour on her sides and cat flap.


I was now able to see she'd been painted green on top of black on top of green. It will be a long time before she gets a paint job but I doubt she'll mind. Far more important things to tend to!

Bringing Her Home

On 12th August 2017 I hired a transporter and returned to Camberley, Surrey, to bring home my first Land Rover:


Project Acquired - Series 2A Land Rover

On 30th July 2017 I paid a deposit on this 1969, H reg, Series 2A Land Rover:


I could see she would need a new outrigger, some patch welds on the chassis, a door post or two, a passenger footwell, and everything else you'd expect from a near fifty year old Land Rover that had been off the road for six years. She even ran briefly!

I didn't find a good reason for the previous owner to have taken her off the road - but I decided the price was right to survive a shock or two.

It was a long two week wait before I could return with a transporter to bring her home.